
GETTING STARTED - THE MANAGEMENT PORTAL
Log in and take a tour of the Management Portal.
UPDATED 25 MAY 2023
The Management Portal
The Management Portal is where you will input data and make edits. This portal is accessed via web browser only, and is optimized for desktop.
An active BANDIE subscription is required to use the Management Portal. See Subscribing To Bandie for help on signing up.
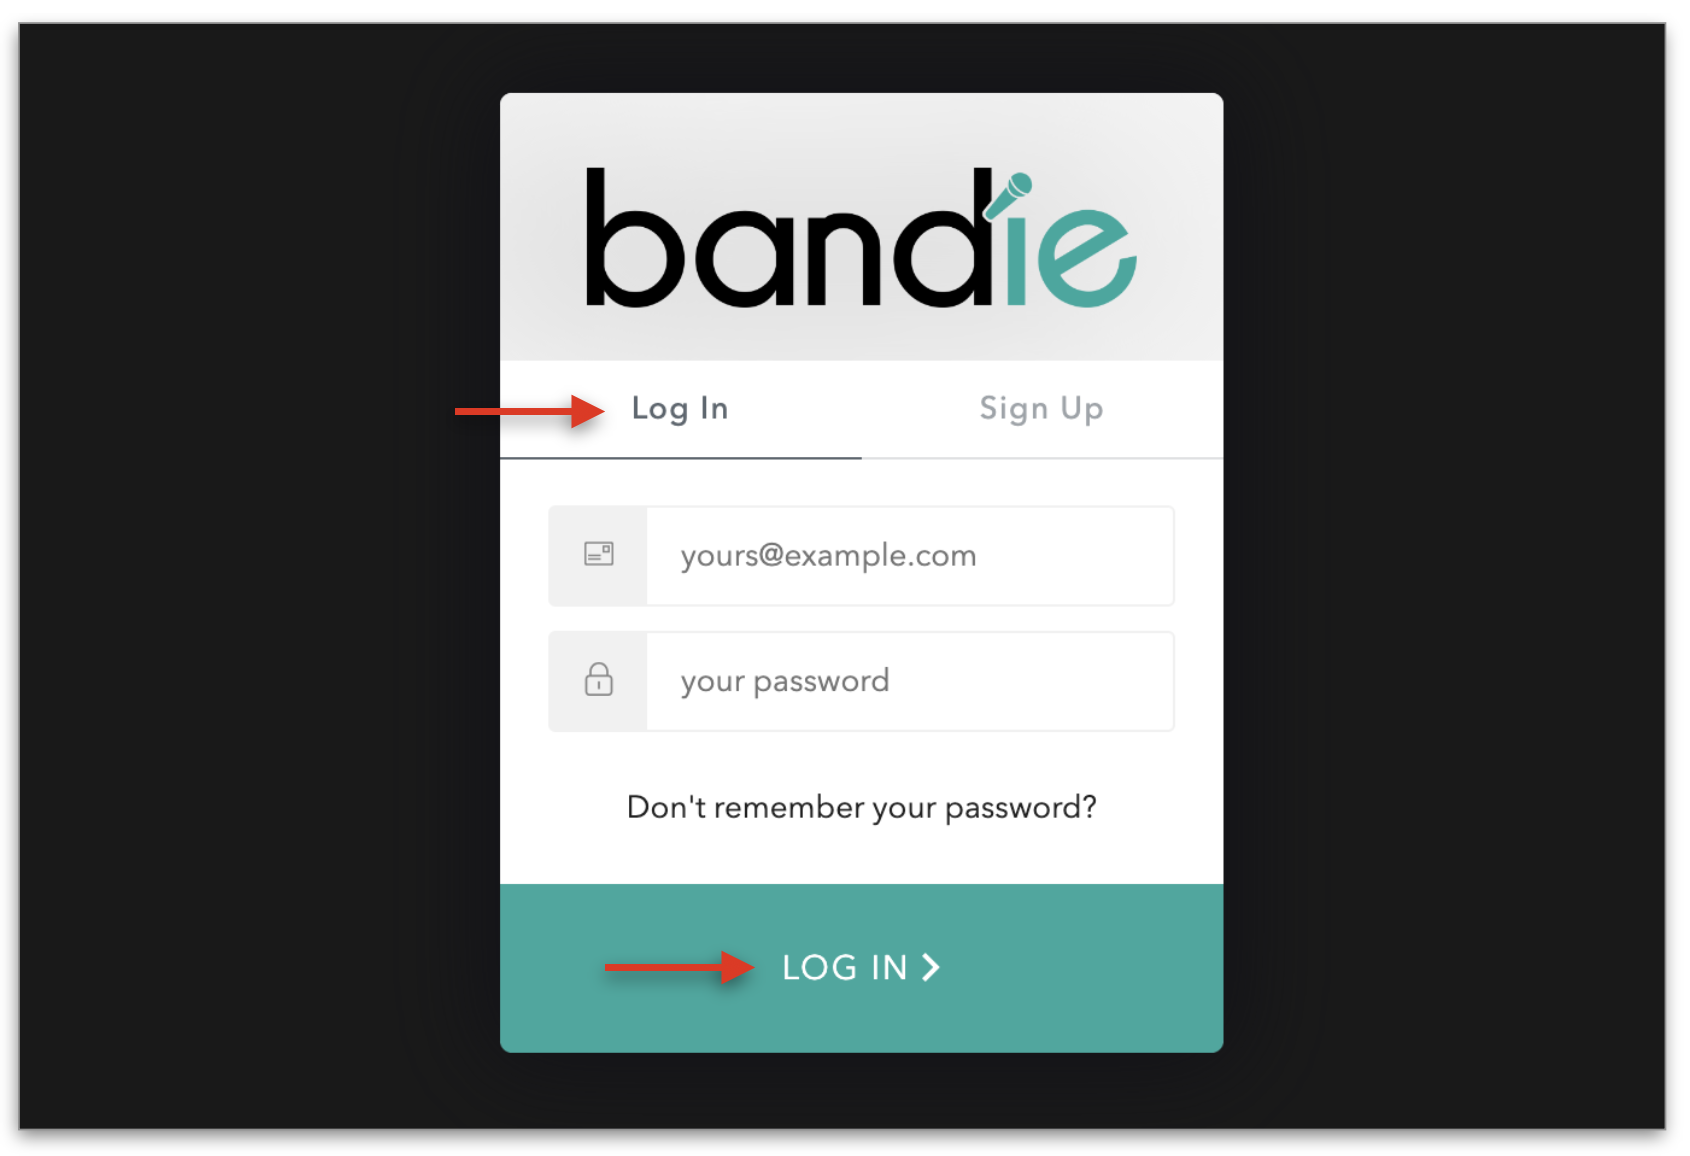
Logging In
The Management Portal can be accessed in two ways:
by pointing your browser to manage.bandieapp.com; or
by visiting bandieapp.com and clicking “LOG IN” in the top menu bar.
Enter your login details, and click the green LOG IN button:
Editing Your Profile Settings
First, let’s fill out some of your band’s profile settings. If you’ve just signed up, you’ll likely have automatically landed on the SETTINGS page.
You can also access the SETTINGS page from the BANDS tab - just click SETTINGS next to your band name:

TIP: Can’t find the BANDS tab? Click the PROFILE icon in the top right of the menu bar, then click “Switch Band”.

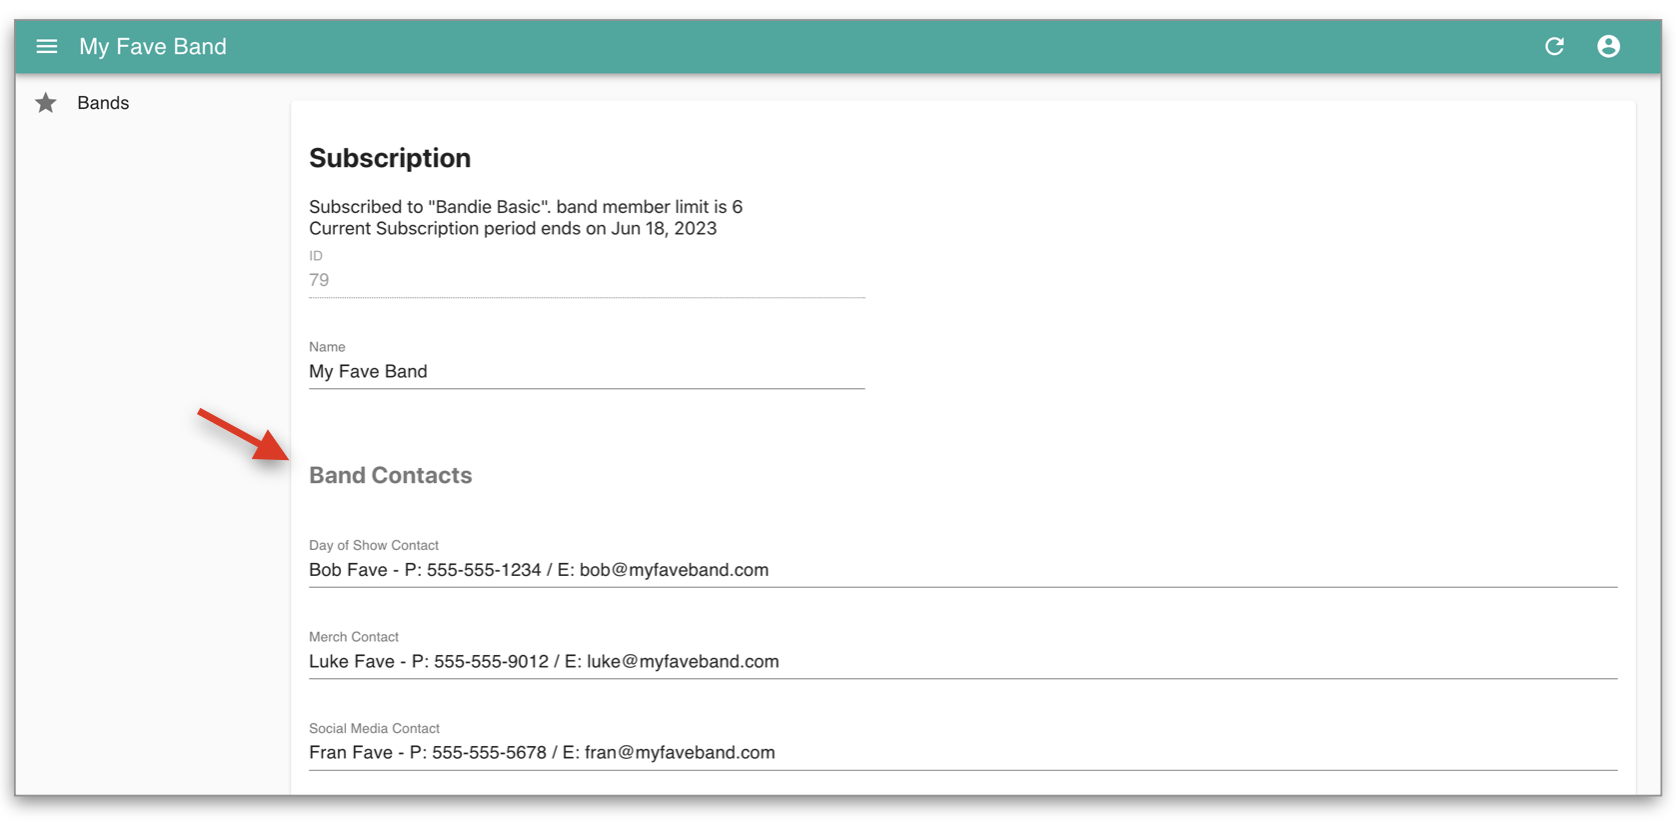
Your band profile is information that doesn’t tend to change substantially from gig to gig - things like band and team contacts, bios and photos, backline requirements, and more. BANDIE uses this information as preset defaults elsewhere on the platform, especially in the Advance tool - but don’t worry, you can always edit it on the fly.
Once you’re on the SETTINGS page, fill out the Band Contacts section. These are the people a promoter or venue might need to get in touch with. Who from your band/crew/team is the usual Day of Show contact? Who’s in charge of your merch? Fill in these contacts here, along with their phone numbers and/or email addresses.
Next, scroll down and fill out the Social Media Accounts section. Enter just the handles on their own - BANDIE will take care of the rest! (An @ symbol is not needed, except for TikTok). Use the below template as a guide:

The Attachments section pulls content from the FILES tab. If you don’t see any files available to add here (or you don’t see the file you want), make sure they’ve been uploaded in the FILES tab. Scroll to the bottom of this article for more information on FILES.
Fill in the Monitor Details and Additional Information sections as needed. The “Sign-off” is what will appear by default at the bottom of your advance (but again, you can always change this on the fly).

Don’t forget to hit SAVE at the bottom of the page when you’re finished.
Managing Your Day-to-Day
Go back to the BANDS tab, and this time, click MANAGE next to your band’s name:

This area is where you’ll do the bulk of your data entry in BANDIE!
You’ll see five tabs along the left sidebar: Members, Days, Shows, Advances, and Files. Let’s explore.
MEMBERS
Here’s where you’ll add all your band, team, and crew members. If you’re the account creator, you’ll see your own email listed here already.
Click EDIT to fill in details, like your name, phone number, and position within the group (e.g., Drums, Tour Manager, Agent, etc.) The account holder, by default, has both Manager and All-Access permissions. Read on to find out what that means.

To add a new member, click +CREATE in the top right. The email you enter for each member is important - this forms part of their login credentials, and it’s where they’ll receive an automated email inviting them to BANDIE. Make sure it’s correct!

When adding a new member, you’ll choose their permission levels by using the All-Access and Manager toggles.

MANAGER gives the member edit access to the BANDIE Management Portal - they’ll be able to enter data and make changes. This is the best setting for tour managers, band members that are actively involved in scheduling, and anyone who plays an administrative role. (Anyone with Manager permissions will likely also need All-Access permissions.)
ALL-ACCESS members are view-only on the mobile app - they can’t make changes, but they can view others’ events in addition to their own. This is the best setting for team members that don’t need edit access, but still need to see everything that’s going on.
Members with no special permissions (neither manager nor all-access) are also view-only. They can only see events that a manager has added them to. This is a great setting for most hired musicians - just make sure that you add them to any events you want them to see!
For more information on how to add members/personnel to specific events, see Creating and Editing a Day.

The Members section is a complete list of all BANDIE users on your account, and should include any semi-regular hired players and crew. We don’t recommend deleting and re-adding members on a regular basis, as this can cause problems with advancing and access. For more information, see Choosing A Plan.
DAYS
For more information on the Days tab, see Creating and Editing a Day.
SHOWS
For more information on the Shows tab, see Creating and Editing a Show.
ADVANCES
For more information on the Advances tab, see Working with Advances.
FILES
This is where you’ll upload files like stage plots, bios, photos, logos, audio tracks, or anything else you might need, either for internal reference or to send to a promoter via the Advance tool. Accepted file types include JPGs, PNGs, MP3s, and PDFs. Any files you upload here will be available in the “Attachments” dropdown menus found throughout BANDIE, including in the Advance tool and in your band’s profile settings.